APA User Guide
Introduction
The APA complements your telephony without replacing it. While using APA, you can keep using the same functions on your phone as before. You now have two ways of calling, answering, transferring, etc.
Installation
This guide assumes APA Client has already been installed with valid licence on your computer. For any issue, please contact your system administrator.
Logging In
To log in, your computer must be connected to the internet so that it can establish a connection with SCOPTEL. You must also have an agent profile configured in SCOPTEL.
-
Start APA client.
-
In the setup screen enter you should have the following fields already filled:
-
server domain and port
-
protocol (HTTP or HTTPS)
-
tenant
-
your phone extension (
If not, see your administrator to set them up properly, otherwise you will not be able to connect to the telephony services).
-
In the login screen enter your user information:
-
agent extension
-
passcode
Logging Out
To log out of APA, click the user icon or name on the far right and select
LOG OUT
.
Telephony
Telephony functions are located at the center of the application ribbon. There is a field to type phone numbers, and appropriate action buttons depending on your status.

Incoming Calls
Once you are logged in the application, you will be notified of incoming calls.

To accept the call, click
ANSWER
. The call will be accepted on your phone terminal, via headset or speaker.
If you administrator has set up the
auto-answer
option for your calls, the call will be automatically picked up without your intervention.
Outgoing Calls
To dial an extension or an outgoing call, type the number in the text box
CLICK HERE TO TYPE #
and click
DIAL
.
Pausing
You can put yourself in pause mode so that you stop receiving phone calls from queues, and your phone sends a busy signal if someone tries to call it.
-
Click the PAUSE button.
-
Select a pause type if applicable.
-
The “away” timer (hours:minutes) will start. It appears next to the button.
-
Click the
UNPAUSE
button.
-
The "active" timer (hours:minutes) will start. It appears next to the button.
Scheduling a callback
-
Press the call disposition button.
-
Select "Callbacks". This will display the
Schedule a callback
window.
-
You can edit the number is required.
-
Open callback date field and in the calendar, select a date and time.
-
Press the checkmark button.
-
Click
Save
.
Do Not Call
-
Press the call disposition button.
-
Select "DO-NOT-CALL". This will display the do-not-call window.
-
You can edit the number is required.
-
Click
Save
.
Call Disposition

-
Press the call disposition button.
-
Select "Tags". This will display the
Tags
window.
-
You can edit the number is required.
-
Select one the available tags and press
Save
.
Kuando Busylight
If your computer is connected to a Kuando Busylight, it will display the following light signals:
-
green: available to receive calls
-
red (pulsing): line is busy
-
blue: incoming call
-
yellow: away (agent is on pause)
Queue Statistics
APA displays two global stats:
-
AWT: the average caller wait time on all queues
-
WAITING: the total number of caller waiting on all queues
-
Click on AWT.
-
Select a queue (the tenant name is shown as the first part of the name).
A new window will pop up. The available statistics are:
-
average wait time
-
average talk time
-
total talking time
-
answered calls
-
abandoned calls
-
waiting calls
-
total calls received
-
service level
-
idle agents
-
busy agents
-
paused agents
This panel will keep displaying the statistics for the selected queue. To change queue, click
BACK
and select the one you want.
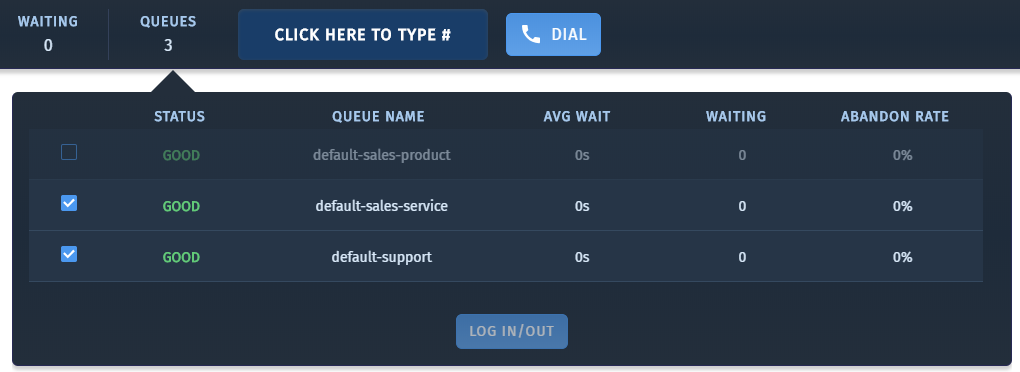
Queue Management
To view activity on the queues and log into or out of queues, you can use the
Queues
view. To open
Queues
view, click on
QUEUES
.
The information displayed includes:
-
STATUS: the compliance status of the queue according to System Level Agreement (SLA) as set up in SCOPTEL. You can quickly see if a queue’s service level is low and requires intervention.
-
QUEUE NAME: the tenant and queue name.
-
AVG WAIT: the average waiting time of callers before their call is answered.
-
WAITING: the number of current callers waiting on the queue.
-
ABANDON RATE: the ration of
abandoned calls. A high ration usually indicates that callers are spending too much time waiting to be answered.
Changing Your Queue
There is also a row of checked boxes on the left. The active ones indicate the queues that you are currently logged in. If system settings allow it, you can log yourself in or out of a queue by clicking a box and clicking
LOG IN/OUT
.
Settings
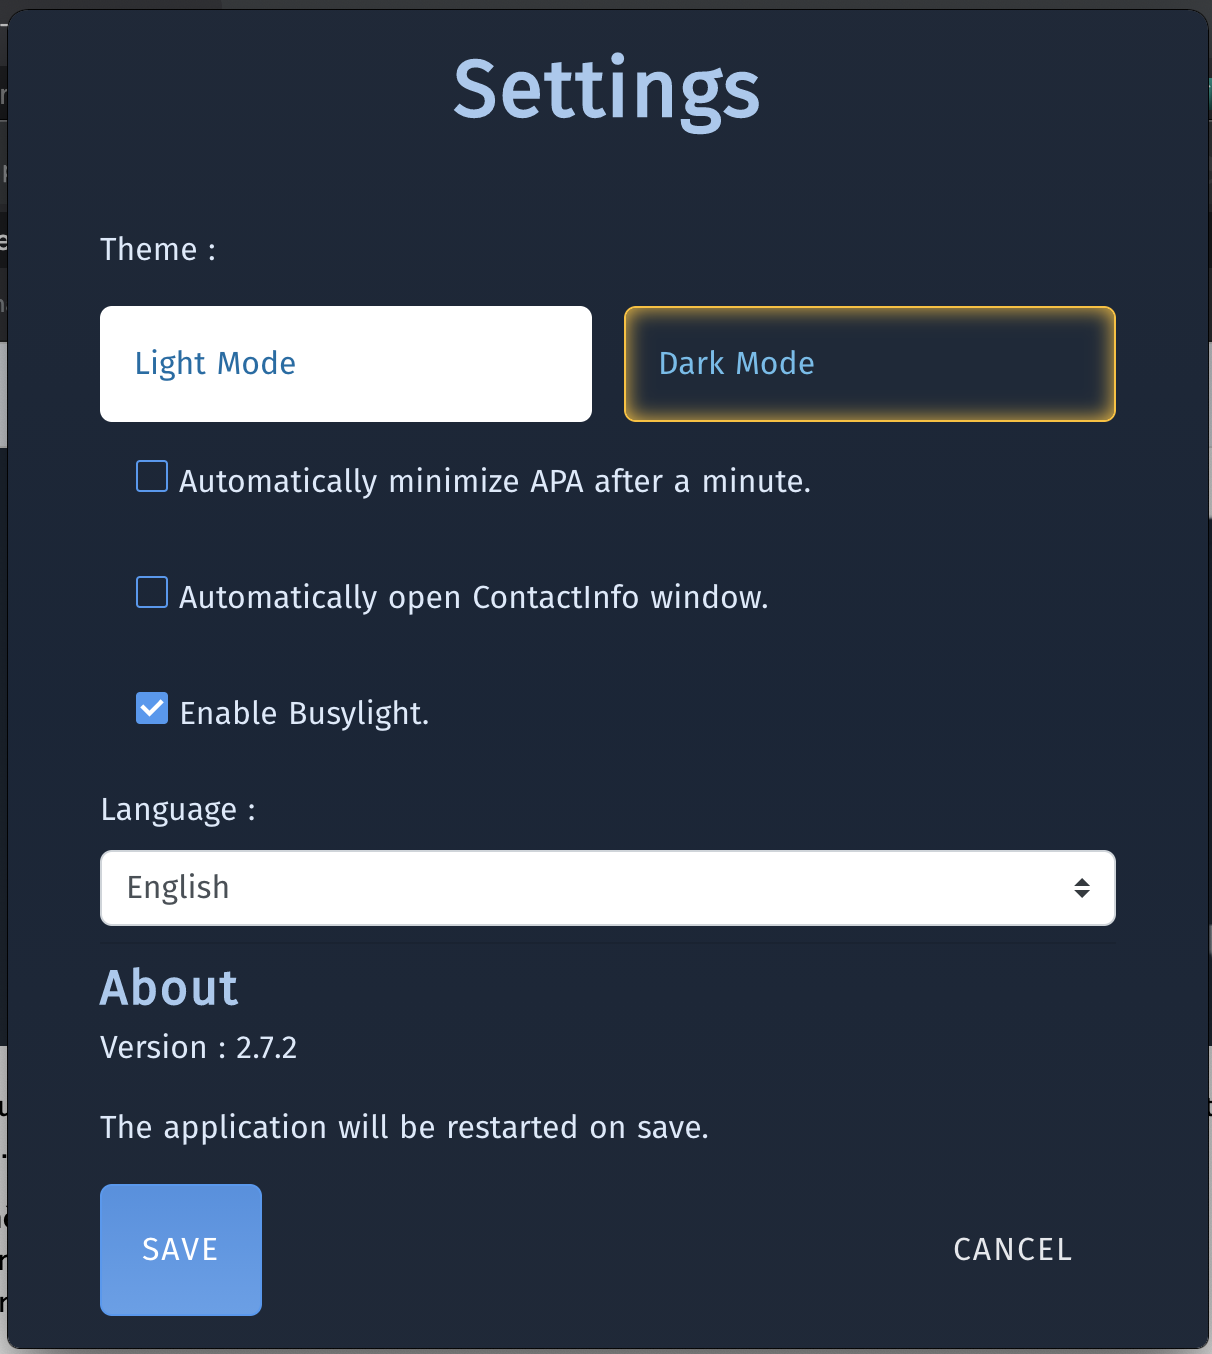
You can access preferences by clicking your user icon or name on the far right and choosing
SETTINGS
. You will see the version number under the About heading. There are several preferences that you can access:
-
Theme: to set the background theme to either dark or light (default).
-
Display: to set which screen will display the app if you have multiple displays.
-
Language: currently English and French are supported.
T
o apply those changes, the application needs to be restarted.
Related Articles
ScopLINK Agent Portal Application
ANOTHER GREAT PRODUCT FROM SCOPSERV INTERNATIONAL INC. APPLICATIONS & FEATURES FOR VISUALIZATION INFORMATION & REPORTS FOR AGENTS for SCOPTEL IPBX The Agent Portal Application installed on a Mac or PC provides an contact center agent with all the ...ScopSTATS Admin Guide
ScopSTATS Admin Guide ScopSTATS is the ScopServ toolkit for generating real time reports, historical data, and system statistics. It also bundles ScopSWITCH utilities to manage your Call Centre and Operator functions. This document is a must read for ...SCOPCOMM End User Guide
SCOPCOMM is SCOPTEL’s softphone solution. It comes in three flavours: softphone: a software installed on your smartphone desktop: a software installed on your desktop computer WebRTC: an online webportal accessed through a web browser or a desktop ...SCOPCOMM Admin Guide
Introduction SCOPCOMM is a softphone and WebRTC solution offered by SCOPSERV International. This guide explains how to enable SCOPCOMM on SCOPTEL and issue provisioning data for user devices. SCOPTEL offers the following SCOPCOMM clients: SCOPCOMM ...ScopTEL Call Forwarding Guide
ScopTEL Call Forwarding Guide A Phone can have a CF All button to enable and disable Call Forwarding or the Call Forwarding Feature Code can be dialed. Default Feature Code for Call Forward - Always : *72 / *73 Call Forward Options are: 1. Voicemail ...